电子工程师技术服务社区
公告
登录
|
注册
首页
技术问答
厂商活动
正点原子
板卡试用
资源库
下载
文章
社区首页
文章
ESP8266简易WIFI天气时钟
分 享
扫描二维码分享
ESP8266简易WIFI天气时钟
esp8266
arduino
天气时钟
码农爱学习
关注
发布时间: 2022-05-26
丨
阅读: 1259
本篇介绍了如何使用ESP8266,通过WIFI连网获取网络天气和网络时间,然后借助U8g2库,在OLED上显示当前时间和天气信息。 # 1 HTTP获取网络天气 连网获取网络天气,一般需要通过http的方式,从天气信息提供商的网络地址获取天气信息。 ## 1.1 注册开发者key 这里以心知天气为例,需要先注册一个开发者账号,然后获取自己的私钥,也就是等下要用到的key。 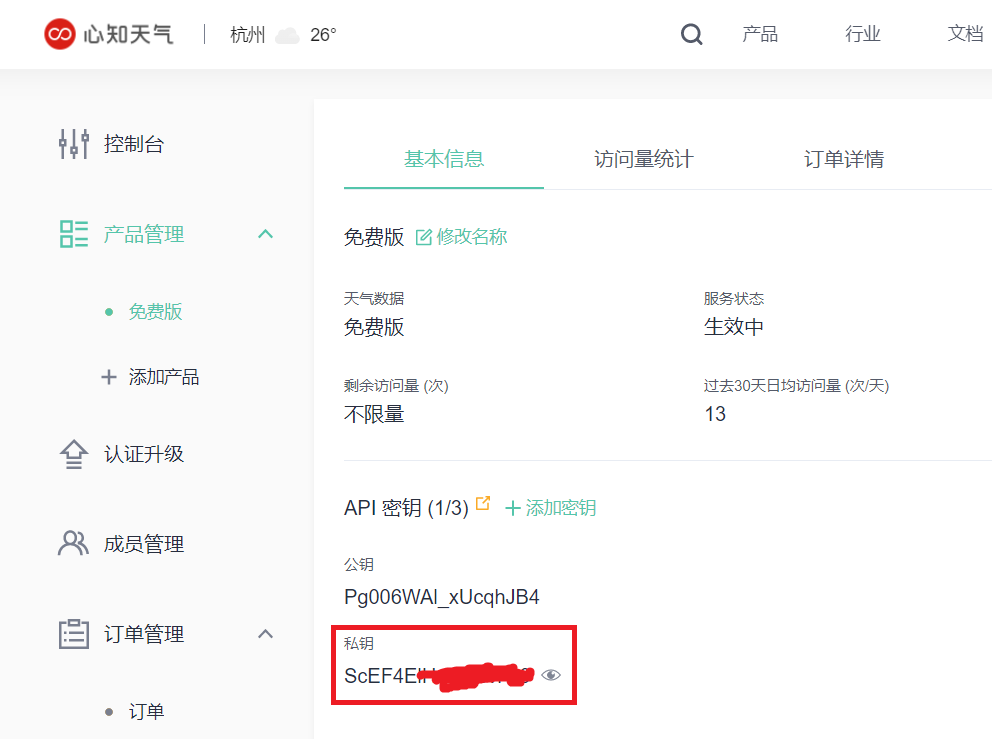 然后可以先在浏览器中输入如下链接,注意要将自己的key替换进去,然后就可以测试一下天气信息的获取情况。 <https://api.seniverse.com/v3/weather/now.json?key=替换为你的私钥&location=HangZhou&language=en&unit=c> 如下即为获取的天气信息,是json格式的:  ## 1.2 http请求基本原理 上面先通过浏览器的方式获取到了天气信息,而ESP8266没有浏览器功能,需要编写代码实现http数据请求。 在编写代码之前,需要先了解一下基础的http请求原理。 url全称是资源描述符,一个url地址,用于描述一个网络上的资源,而http中的get、post、put、delete就对于着这个资源的查、改、增、删4个操作,get一般用于获取/查询资源信息。 url的格式: 【协议】://【主机名(或者叫域名)】【:端口号(可选)】/【文件路径】/【文件名】 例如:<https://api.seniverse.com/v3/weather/now.json?key=替换为你的私钥&location=HangZhou&language=en&unit=c> - 协议:https - 域名:api.seniverse.com 客户端发送一个HTTP请求到服务器的请求消息包括以下格式:请求行(request line)、请求头部(header)、空行和请求数据四个部分组成,下图给出了请求报文的一般格式。  服务器HTTP响应也由四个部分组成,分别是:状态行、消息报头、空行和响应正文。  根据http协议,可以编写ESP8266进行http请求的代码: ```c++ const char* host = "api.seniverse.com"; // 将要连接的服务器地址 const int httpPort = 80; // 将要连接的服务器端口 // 心知天气HTTP请求所需信息 String reqUserKey = "xxxxxxxxxxxxxxxxx"; // 私钥 String reqLocation = "HangZhou"; // 城市 String reqUnit = "c"; // 摄氏/华氏 // 建立心知天气API当前天气请求资源地址 String reqRes = "/v3/weather/now.json?key=" + reqUserKey + + "&location=" + reqLocation + "&language=en&unit=" +reqUnit; // 建立http请求信息 // 请求方法(GET)+空格+URL+空格+协议(HTTP/1.1)+回车+换行+ // 头部字段(Host)+冒号+值(服务器地址)+回车+换行+ // 头部字段(Connection)+冒号+值(close)+回车+换行+回车+换行 String httpRequest = String("GET ") + reqRes + " HTTP/1.1\r\n" + "Host: " + host + "\r\n" + "Connection: close\r\n\r\n"; WiFiClient client; // 尝试连接服务器 if (client.connect(host, 80)) { // 向服务器发送http请求信息 client.print(httpRequest); Serial.println("Sending request: "); Serial.println(httpRequest); // 获取并显示服务器响应状态行 String status_response = client.readStringUntil('\n'); Serial.print("status_response: "); Serial.println(status_response); // 使用find跳过HTTP响应头 if (client.find("\r\n\r\n")) { Serial.println("Found Header End. Start Parsing."); } // 利用ArduinoJson库解析心知天气响应信息 parseInfo(client); } ``` ## 1.3 json数据解析 http请求获取到的天气数据是json格式的,需要对数据进行解析,获取到具体的天气和温度等数据。 可以将获取的json原始数据打印出来,方便确认程序是否获取到的天气数据。 具体代码如下: ```c void parseInfo(WiFiClient client) { const size_t capacity = JSON_ARRAY_SIZE(1) + JSON_OBJECT_SIZE(1) + 2 * JSON_OBJECT_SIZE(3) + JSON_OBJECT_SIZE(6) + 230; DynamicJsonDocument doc(capacity); deserializeJson(doc, client); Serial.println(doc.as<String>()); JsonObject result0 = doc["results"][0]; JsonObject result0_now = result0["now"]; // 通过串口监视器显示以上信息 g_strWeather = result0_now["text"].as<String>();// "Sunny" g_iCode = result0_now["code"].as<int>();// "0" g_iTemperature = result0_now["temperature"].as<int>();// "32" g_strUpdateTime = result0["last_update"].as<String>();// "2020-06-02T14:40:00+08:00" Serial.println(F("======Weahter Now=======")); Serial.print(F("Weather Now: ")); Serial.print(g_strWeather); Serial.print(F(" -> ")); Serial.println(g_iCode); Serial.print(F("Temperature: ")); Serial.println(g_iTemperature); Serial.print(F("Last Update: ")); Serial.println(g_strUpdateTime); Serial.println(F("========================")); } ``` 原始json格式的天气数据和解析后的天气和温度数据如下:  **天气现象代码对照表** 解析到的天气数据,除了英文形式的天气信息(text),还有一个对应的天气码(code),如上图的Cloudy对应的天气码是4。通过天气码,也可以转换为天气。天气码的对照表可参考心知天气文档:<https://docs.seniverse.com/api/start/code.html>  简化起见,这里只使用常用的4种天气。 | 代码 | 中文 | 英文 | | ---- | -------------------- | ----------- | | 0 | 晴(国内城市白天晴) | Sunny | | 4 | 多云 | Cloudy | | 9 | 阴 | Overcast | | 13 | 小雨 | Light Rain0 | # 2 NTP网络时间 NTP(Network Time Protocol) 是网络时间协议,它是用来同步网络中各个计算机时间的协议。 ESP8266可以连网,那就也可以通过获取网络时间来得到当前的时间: ```c time_t getNtpTime() { IPAddress ntpServerIP; // NTP服务器的地址 while(Udp.parsePacket() > 0); // 丢弃以前接收的任何数据包 Serial.println("Transmit NTP Request"); // 从池中获取随机服务器 WiFi.hostByName(ntpServerName, ntpServerIP); Serial.print(ntpServerName); Serial.print(": "); Serial.println(ntpServerIP); sendNTPpacket(ntpServerIP); uint32_t beginWait = millis(); while (millis() - beginWait < 1500) { int size = Udp.parsePacket(); if (size >= NTP_PACKET_SIZE) { Serial.println("Receive NTP Response"); isNTPConnected = true; Udp.read(packetBuffer, NTP_PACKET_SIZE); // 将数据包读取到缓冲区 unsigned long secsSince1900; // 将从位置40开始的四个字节转换为长整型,只取前32位整数部分 secsSince1900 = (unsigned long)packetBuffer[40] << 24; secsSince1900 |= (unsigned long)packetBuffer[41] << 16; secsSince1900 |= (unsigned long)packetBuffer[42] << 8; secsSince1900 |= (unsigned long)packetBuffer[43]; Serial.println(secsSince1900); Serial.println(secsSince1900 - 2208988800UL + timeZone * SECS_PER_HOUR); return secsSince1900 - 2208988800UL + timeZone * SECS_PER_HOUR; } } Serial.println("No NTP Response :-("); //无NTP响应 isNTPConnected = false; return 0; //如果未得到时间则返回0 } ``` # 3 OLED显示页面设计 获取到天气信息和时间后,需要将这些信息显示出来。 这里使用0.96寸OLED显示屏来显示,借助U8g2库,显示文字与天气图标。 具体的显示代码如下: ```c void testShowTimeAndWeather(rtc_time_t &now_time, weather_info_t &weather_info) { u8g2.clearBuffer(); int tm_year = now_time.tm_year; int tm_month = now_time.tm_mon; int tm_day = now_time.tm_mday; int tm_hour = now_time.tm_hour; int tm_minute = now_time.tm_min; int tm_sec = now_time.tm_sec; int tm_week = now_time.tm_week; //时分 char str_big_time[] = ""; my_strcat(str_big_time, tm_hour); strcat(str_big_time,":"); my_strcat(str_big_time, tm_minute); u8g2.setFont(u8g2_font_logisoso24_tf); u8g2.drawStr(0, 30, str_big_time); //秒 char str_small_sec[] = ""; my_strcat(str_small_sec, tm_sec); u8g2.setFont(u8g2_font_wqy14_t_gb2312); u8g2.drawStr(73, 30, str_small_sec); //日期 char str_date[] = ""; char str_temp[6]; itoa(tm_year,str_temp,10); strcat(str_date,str_temp); strcat(str_date,"-"); my_strcat(str_date, tm_month); strcat(str_date,"-"); my_strcat(str_date, tm_day); u8g2.drawStr(0, 47, str_date); u8g2.setCursor(0, 63); u8g2.print("星期"); switch (tm_week) { case 1: u8g2.print("日"); break; case 2: u8g2.print("一"); break; case 3: u8g2.print("二"); break; case 4: u8g2.print("三"); break; case 5: u8g2.print("四"); break; case 6: u8g2.print("五"); break; case 7: u8g2.print("六"); break; default: break; } u8g2.setCursor(60, 63); u8g2.print("杭州"); //分割线 u8g2.drawLine(90, 0, 90, 63); //天气 if (weather_info.iconIdx<0 || weather_info.iconIdx>3) //没有对应的天气图标 { Serial.print("no icon for weather: "); Serial.println(weather_info.weather); } else { u8g2.setFont(u8g2_font_open_iconic_weather_4x_t ); u8g2.drawStr(96, 34, icon_index[weather_info.iconIdx]); } char temperature_tmp[25]; itoa(weather_info.temp, temperature_tmp, 10); strcat(temperature_tmp,"℃"); u8g2.setFont(u8g2_font_wqy16_t_gb2312); u8g2.setCursor(96, 55); u8g2.print(temperature_tmp); u8g2.sendBuffer(); } ``` # 4 最终效果  # 5 总结 本篇介绍了http获取网络天气的基本原理,并通过实践,使用ESP8266连网获取网络天气和网络时间,借助U8g2库,在OLED上显示当前时间和天气信息。
原创作品,未经权利人授权禁止转载。详情见
转载须知
。
举报文章
点赞
(
0
)
码农爱学习
关注
评论
(0)
登录后可评论,请
登录
或
注册
相关文章推荐
MK-米客方德推出工业级存储卡
Beetle ESP32 C3 蓝牙数据收发
Beetle ESP32 C3 wifi联网获取实时天气信息
开箱测评Beetle ESP32-C3 (RISC-V芯片)模块
正点原子数控电源DP100测评
DP100试用评测-----开箱+初体验
Beetle ESP32 C3环境搭建
【花雕体验】16 使用Beetle ESP32 C3控制8X32位WS2812硬屏之二
X
你的打赏是对原创作者最大的认可
请选择打赏IC币的数量,一经提交无法退回 !
100IC币
500IC币
1000IC币
自定义
IC币
确定
X
提交成功 ! 谢谢您的支持
返回
我要举报该内容理由
×
广告及垃圾信息
抄袭或未经授权
其它举报理由
请输入您举报的理由(50字以内)
取消
提交